

Are you anxious to try WordPress but worried you don’t know enough to get it set up? This guide will show you how to get a basic WordPress site running in under an hour. To be clear, this is how to get a WordPress site running on your own domain and NOT a site through WordPress.com or WordPress.org. This is not by any means an exhaustive list on how to set up WordPress. It is a guide on how to set it up quickly.
Step One – Get a hosting provider with domain registration
The hosting provider that I use is cPanel. It has an administration tool to set up the webhost and domain. I find it intuitive to use but I have been using it for years. You can also use Go Daddy or Bluehost . They are all very similar.
Whichever one you choose, just remember to get the domain name with the hosting service. I am with Canadian Webhosting and I pay about 10 bucks a month for up to 5 hosts. My domain costs are 12 bucks a year for .com domains and 25 bucks a year for .ca.
I can’t show you step by step but when you are on the webhosts site, they will have video tutorials on how to do it. You can also contact their support ahead of time.
Step Two – Install WordPress for Your Domain
You can do this two ways. The first way is to go to WordPress.org and follow the 5 minute install procedure. In a nut shell:
- Download the install files via FTP to your webhosting providers site that is allocated to you.
- Extract the files.
- Set the correct file permissions.
- Create a Database and user in MySQL.
- Run the install Script
OR
If you have a webhosting provider with an install system (like cPanel and WordPress Install Manager by Softaculous), all of the above steps are taken care of for you.
Let’s hope you have the latter, especially since this is your first time.
Step Three – Pick a theme
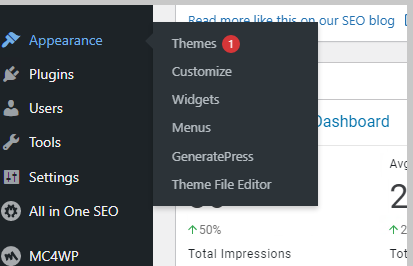
Your default install of WordPress will come with some themes. I recommend using those until you get more acquainted with the system. To install or switch themes you go to your dashboard and select Appearance / Theme. Hover your mouse over the theme you are interested in and then click the activate button. If you are not sure click the “Live Preview” button to preview the theme. It really doesn’t matter you can easily switch between themes.
Step Four – Install Some Basic Plugins
Now that you have WordPress Installed, some essential plugins that help your site run smooth and help with administration are in order. All you need to do is go to your dashboard and click plugins in the left middle of the screen and let the plugins screen load on the right. At the top left of the screen is the “Add New” button.
Click it and you will be brought to the plugin screen. Here you can search for any plugin your heart desires and it will be available to you. They are all free to download and install but if you need more functionality than the plugin has and the developer has it available, you will need to purchase the premium plugin.
Once you found the plugin you are looking for click install and the plugin will be installed:

The above example shows you. Once it is installed the “Install Button” will change to an “Activate Button”. In order for the plugin to start functioning you will need to click it. I recommend you read the documentation on how to use the plugin you downloaded. They are all a bit different but the settings for each plugin will be along the left-hand side of the dashboard or in the plugins section.
Here are the essential plugins:
Really Simple SSL
All websites use SSL when users connect to them now. It used to be only for banking and ecommerce sites but all sites use them now. All the commercial web browsers even give a warning now if you connect to a non-SSL site. How do you know you are connected to an SSL site? There will be a padlock icon next to the address of the site in the address bar. You want people to feel safe when they browser you WordPress site even if it is just viewing picture of your pets! Really Simple SSL makes this very easy to do.
Maintenance Plugin
While you are getting you site up and running it might be a live site (meaning people can browse it). A good maintenance plugin will let them know that the site is going through “scheduled maintenance” or “coming soon”. They are all generally pretty good. The one I use is simply called Under Construction.
Caching Plugin
Caching is a process whereby any content deemed static on your site will not have to be fetched and rendered on your client’s screen. If it is already in your site memory it just has to be rendered. This is great for content or images that do not change very often. It speeds up your site and gives a more positive experience to the user. As your site becomes bigger and bigger this becomes more important. The plugin I use is WP-Optimize .
Social Sharing
You want you user to spread the word about your blog. A great way is to do it through social media. Make it easy for a user to click a button a share it to their favorite social media platform. I use the Easy Social Sharing.
Search Engine Optimization
You would like your articles to eventually start showing up on Google (I was going to say “search engines” but who are we kidding!). A good SEO plugin that can help you tweak your blog post after you create it is to make sure it is search engine friendly. Your content and format of the post have to be written in a certain way. It changes all the time so you need to check on this from time to time and make sure you are still following the right trends. I use the All In One SEO plugin. It does a great job of grading my content. In fact this article got 97 /100!
Subscriber List
Contrary to popular belief email is not dead. Another way to get more views on your blog is to get interested users to sign up for email updates to your content. A good email subscriber plugin will do this. You can customize the message they receive when they subscribe / unsubscribe / change mailing preferences and receive content. All plugins even have the ability for you to choose where you would like the sign-up screen to appear on your site. I use Mail Poet .
As an aside, I would always enable Auto-Update. It will keep your site as secure as possible.
There, you know have spent less than an hour getting your basic site set up and ready to go! This next step occurs after set up so this is after the hour, but you are on a roll so why not?
Step 5 – Write a blog post.
Now that you are a blogger you will be cycling through steps 2 – 5 indefinitely!! You will want to get other items on the go like Google Site Kit but let’s get the hang of blogging and we will go from there.
Now that I have given the article that SEO wants me to write I just wanted to add some of my personal experiences to the post. You see, I have been using WordPress on and off since 2014. I ran a life style blog for about two years and at one time managed about three different WordPress sites. Apart from my own site, I only manage my wife’s business site at the moment.
Now go start your blog and make your mark on the world!
Dan
I am an IT professional with over twenty years experience in the field. I have supported thousands of users over the years. The organizations I have worked for range in size from one person to hundreds of people. I have performed support from Help Desk, Network / Cloud Administration, Network Support, Application Support, Implementation and Security.